Cloud Gateway集成Nacos
Spring Cloud Gateway集成Nacos
前述
在上一篇笔记中,你会发现yaml里配置了Nacos注册中心,这样做的好处就是不用关心服务的IP地址,使得网关能够从注册中心自动获取uri(负载均衡)
    gateway:
      discovery:
        locator:
          enabled: true #开启从注册中心动态创建路由的功能,利用微服务名进行路由
          lower-case-service-id: true #是否将服务名称转小写
      routes:
        - id: payment-service                  #路由的ID,没有固定规则但要求唯一,建议配合服务名
          uri: lb://cloud-payment-service      #匹配后提供服务的路由地址
集成Nacos
pom文件引入Nacos依赖
<!--nacos注册中心-->
    <dependency>
      <groupId>com.alibaba.cloud</groupId>
      <artifactId>spring-cloud-starter-alibaba-nacos-discovery</artifactId>
    </dependency>
主启动类开启注册中心功能
@SpringBootApplication
@EnableDiscoveryClient
public class GateWayMain9527 {

    public static void main(String[] args) {
        SpringApplication.run(GateWayMain9527.class,args);
    }
}
配置文件指定Nacos注册中心的地址
其中:
lb:固定格式,指的是从nacos中按照名称获取微服务,并遵循负载均衡策略service-name:nacos注册中心的服务名称,这里并不是IP地址形式的
spring:
  main:
    allow-bean-definition-overriding: true
  application:
    name: cloud-gateway
  cloud:
    nacos:
      discovery:
        server-addr: localhost:8848
    gateway:
      discovery:
        locator:
          enabled: true #开启从注册中心动态创建路由的功能,利用微服务名进行路由
          lower-case-service-id: true #是否将服务名称转小写
      routes:
        - id: payment-service                  #路由的ID,没有固定规则但要求唯一,建议配合服务名
          uri: lb://cloud-payment-service      #匹配后提供服务的路由地址
          predicates:
            - Path=/payment/**              # 断言,路径相匹配的进行路由
            #- After=2020-02-21T15:51:37.485+08:00[Asia/Shanghai] 在该时间点之后有效
            #- Cookie=username,zzyy
            #- Header=X-Request-Id, \d+        # 请求头要有X-Request-Id属性并且值为整数的正则表达式
        - id: order-consumer
          uri: lb://nacos-order-consumer
          predicates:
            - Path=/consumer/**
实现动态路由
上述例子中,我们将网关的一些配置写到项目的配置文件中,一旦出现路由发生变更必须要重新打包发布项目,这样维护成本很高也很耗时。
我们既然用了Nacos作为注册中心,同样的,我们也可以把Nacos作为网关的配置中心,这样由配置中心统一管理,一旦路由发生改变,只需要在配置中心修改发布,这样便能达到一处修改,多出生效的目的。
1、引入nacos配置中心依赖
<!--    nacos配置中心的依赖-->
    <dependency>
      <groupId>com.alibaba.cloud</groupId>
      <artifactId>spring-cloud-starter-alibaba-nacos-config</artifactId>
    </dependency>
2、在bootstrap.yml 文件中指定Nacos作为配置中心
spring:
  application:
    ## 指定服务名称,在nacos中的名字
    name: cloud-gateway
  cloud:
    nacos:
      ## todo 此处作为演示,仅仅配置了后缀,其他分组,命名空间根据需要自己配置
      config:
        server-addr: 127.0.0.1:8848
        ## 指定文件后缀未yaml
        file-extension: yaml
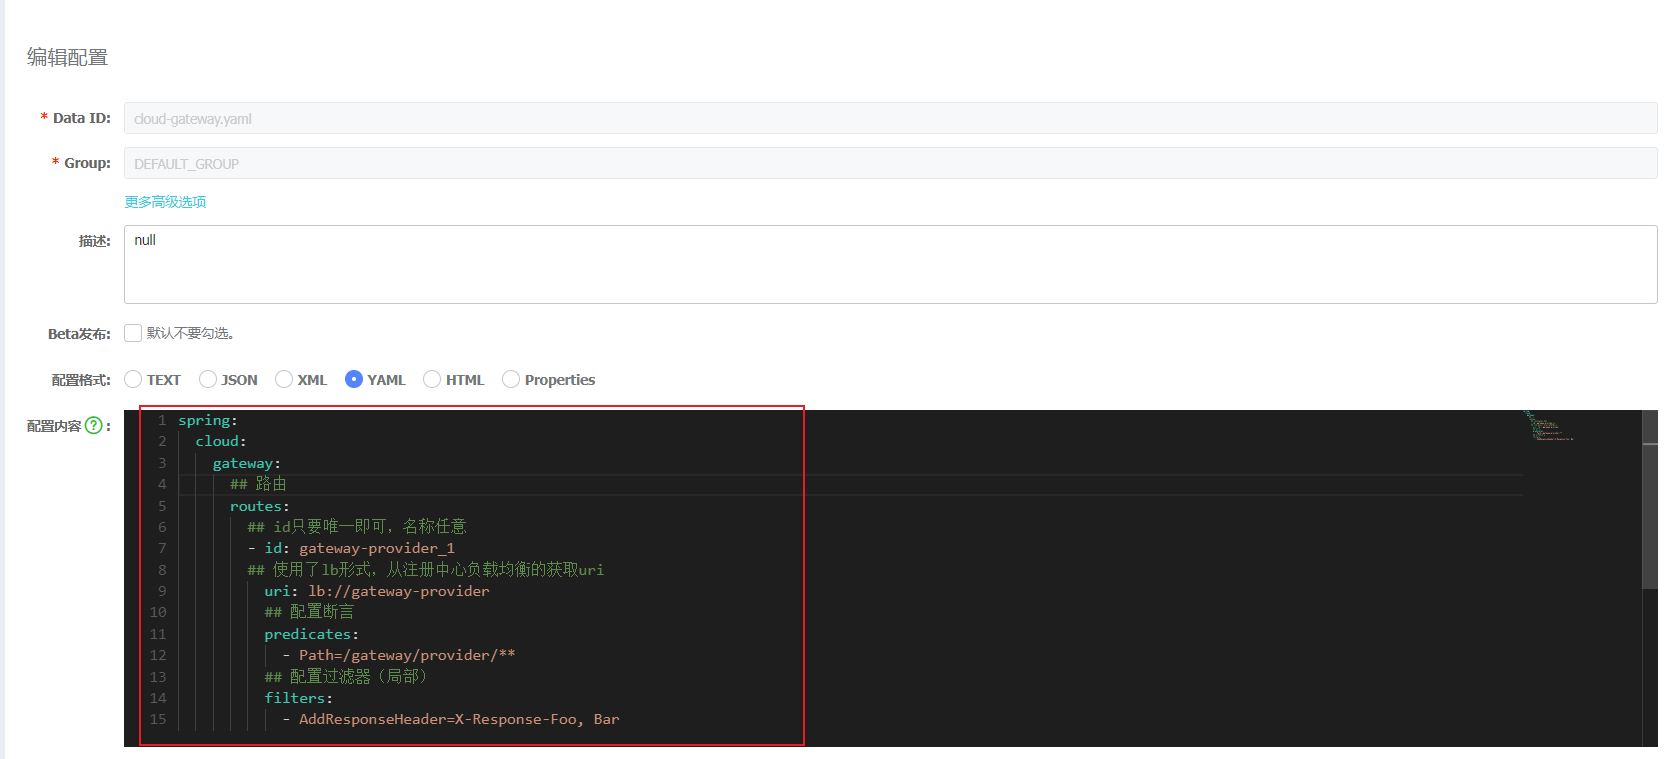
3、在Nacos中创建dataId为cloud-gateway.yaml的配置

